
For our theme this week our challenge is
ROUND AND ROUND
For this you may use any image which implies this movement...ie things with wheels or which move in this manner etc or in fact cards with some moving parts.

My first card uses a background stamp from Lili Of The Valley stamped in Cup-O-Jo Shadow Ink from hero arts. I also stamped the sentiment onto a tape with the same ink. This is then stitched into the card and finished off with a button and twine.

The second card used a fabulous set from Stampin Up inked using the stampin write markers in real red, so saffron and basic grey. I fussy cut out the motorcycle and raised it up slightly... There are also some micro beads on the spray off the back.
I'm off to Scotland for a week tomorrow so hopefully I'll still be able to visit from my Ipad but apologies now if I'm still catching up next weekend....
I'm off to Scotland for a week tomorrow so hopefully I'll still be able to visit from my Ipad but apologies now if I'm still catching up next weekend....

My first card is a simple one with an image from Stampin' Up and a sentiment from Lili of the Valley. A few parts of the image have been highlighted with colour and the edges of the panel scored to give a finished appearance.
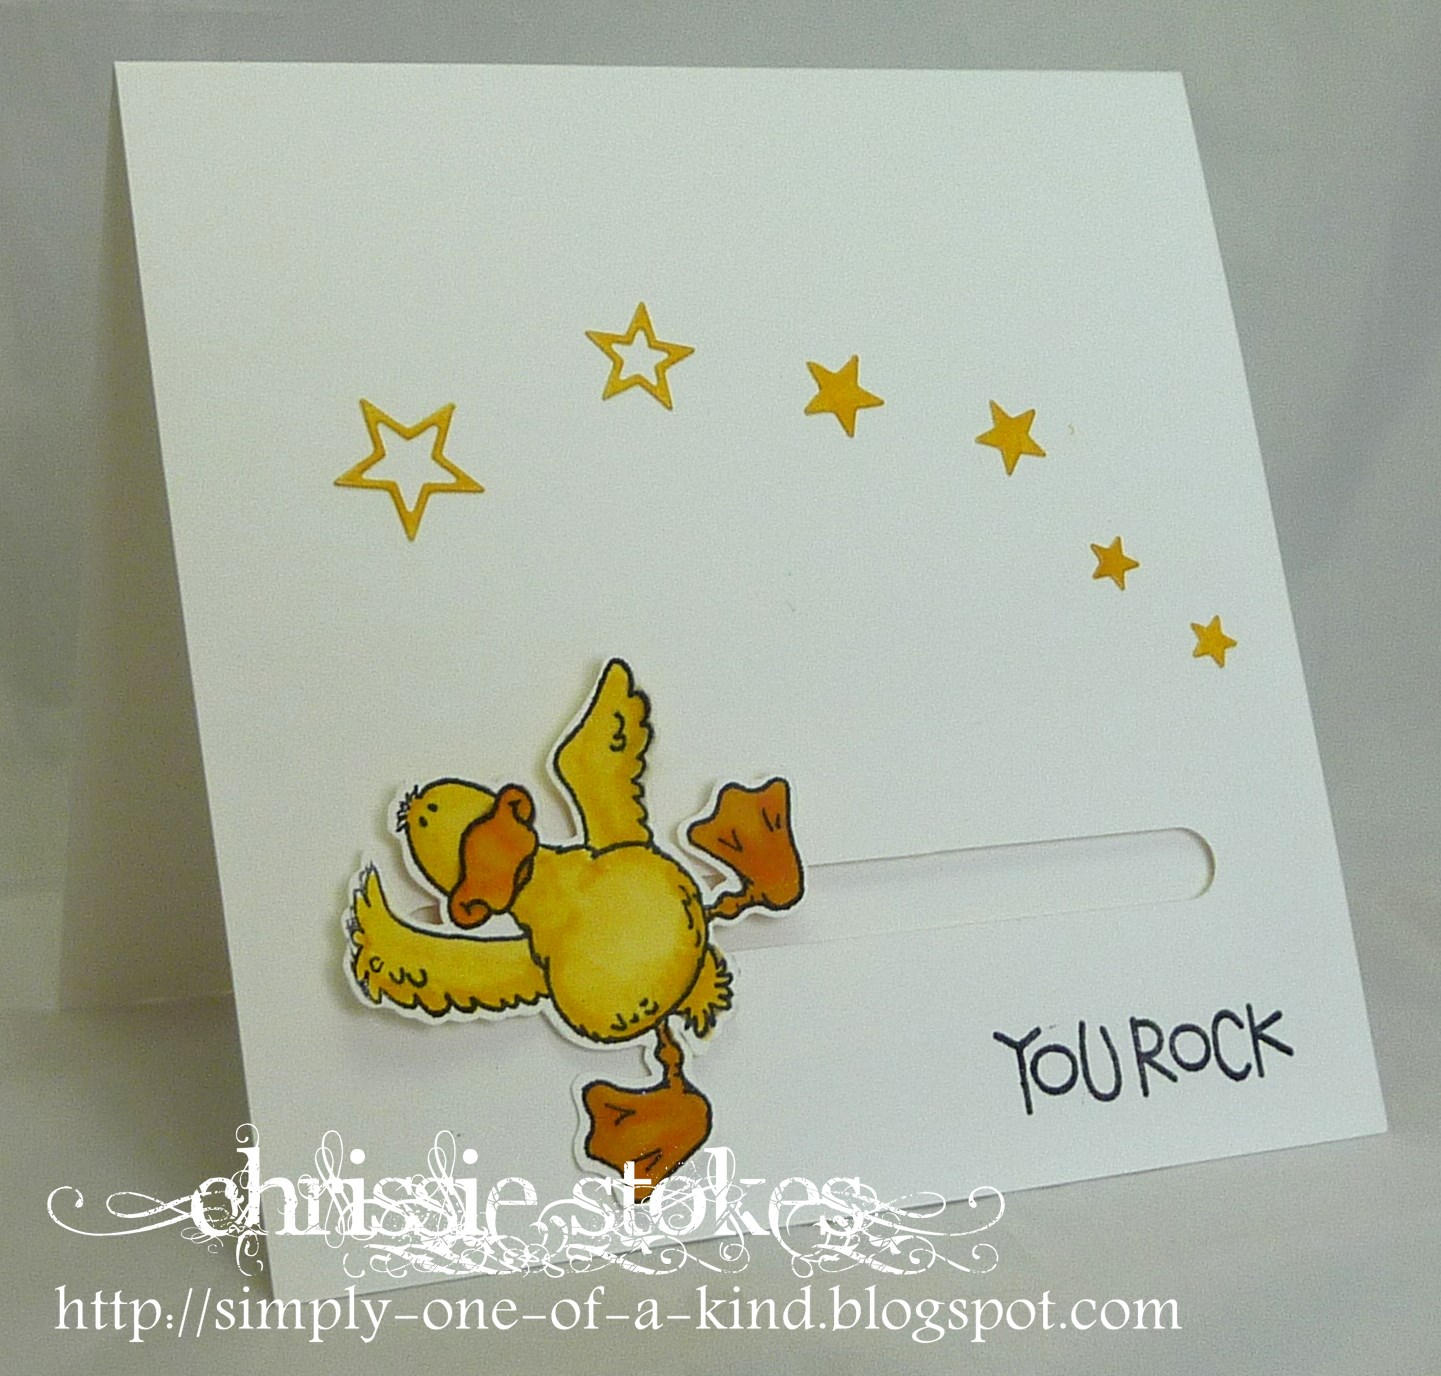
I decided to make a simple spinner card as my second sample this week and as we haven't done a tutorial for quite some time, I thought I would add a few pics to show some of the stages of construction.
Sadly I don't remember the make of the cute duck, I believe I won it for a challenge a while back. It's unmounted red rubber. If anyone can elucidate that would be wonderful!
- Stamp and colour the image, then cut out.
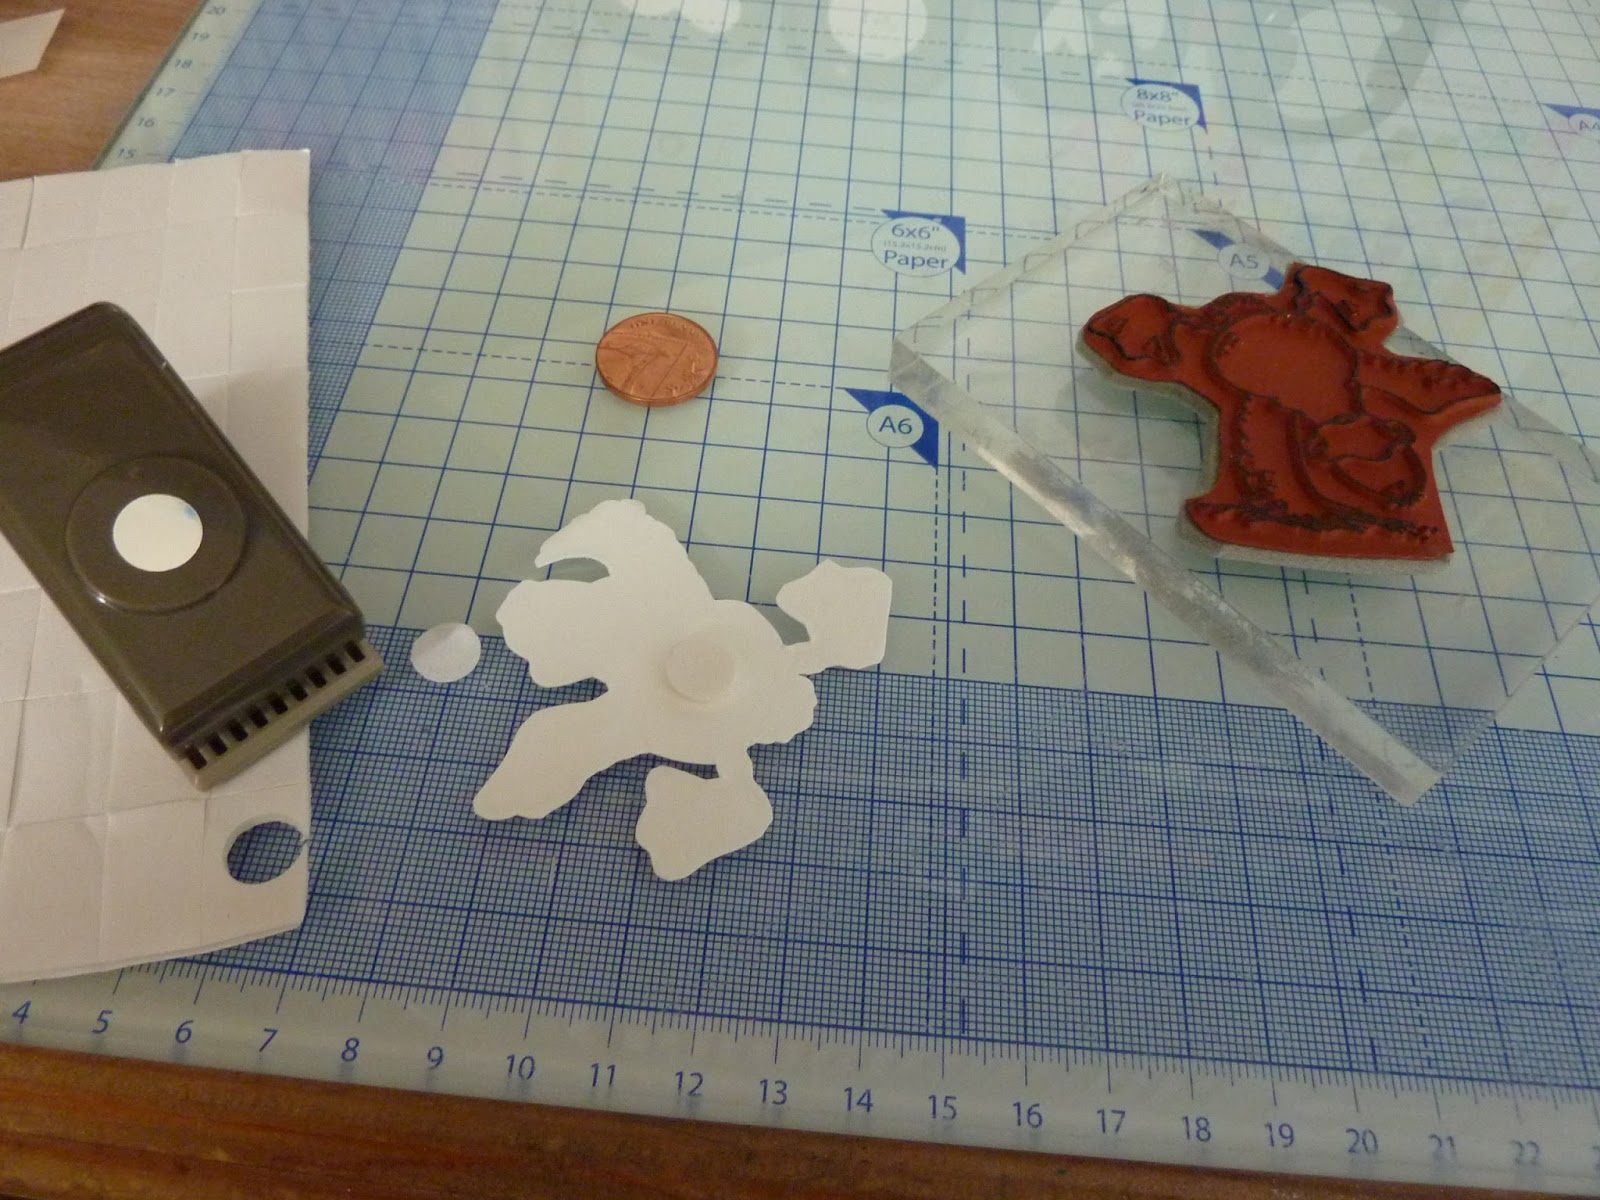
- Cut a circular spot from some double sided dimensional material and stick in the centre, on the reverse of the image you wish to rotate.
- Cut a track in a piece of card (I used the front of the card for this) using a Word Window punch or use a craft knife and ruler. Ensure that this track is slightly wider than the circular dimensional pad you stick on the back of the image!

- Surround the track with dimensional pads or tape ensuring that there is space around it for a coin to spin.

- With the image on the front of the card, stick a small coin to the other size of the circular dimensional from the back, as shown.

- Attach a backing piece of card to the dimensional tape, covering the coin.
- Decorate the front of the card with stars.
***
Awesome cards ladies. Love the spinner Chrissie.
ReplyDeleteGreat cards from you both. Chrissie, the duck stamp is by High Hopes :o)
ReplyDeleteThanks Michelle!
DeleteI'll have to try to remember that!
FABULOUS examples to get us all started too
ReplyDeleteKathyk
Another thoughtful challenge, great samples and a lovely clear tutorial, thank you both! Gay x
ReplyDeleteWow on the cards! Chrissie, great tutorial and Tara I love your "Out of this World" card.
ReplyDeleteTer ;)
lovely cards ladies!
ReplyDeleteFantastic cards, ladies! (Great motorcycle card ideas for the Mister!) Chrissie, thank you for the how-to for the tumbling duck! You did a wonderful job showing him on the video and it was lovely to hear your voice. The twinks will get such a kick out of a card like this!!
ReplyDeleteThank you for the super fun challenge! Thanks for the video about the slider card, too! How fun! Gorgeous work, gals! :) Mynn xx
ReplyDelete